教程开始:
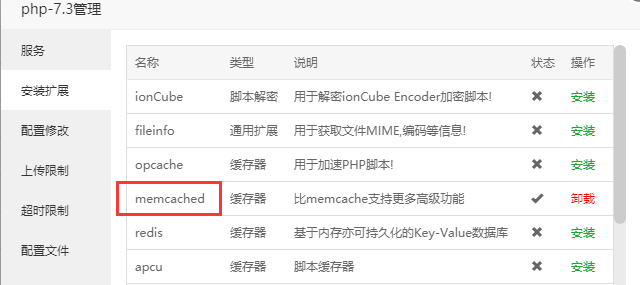
1.宝塔面板安装 Memcached2.进入左侧的软件商店,找到 Memcached 1.5.16 安装,然后在 PHP 相对应的版本中安装拓展,如下图所示:
如图:
然后:
下载 object-cache.php 和 advanced-cache.php
将以下两个文件上传到/wp-content/目录,注意不是/wp-content/plugins/目录。
下载地址:object-cache.php 和 advanced-cache.php
上述所说步骤做完之后,编辑博客根目录的 wp-config.php 文件,添加下方两段代码进去并保存:
代码:
//激活 Batcache
define('ENABLE_CACHE', true);
//激活 Memcached
define('WP_CACHE', true);
上方步骤完成之后,进入后台已安装插件,如下图所示,就已经开启了 Memcached 缓存功能,试试打开速度,是不是飞快?
下载好的单文件如图:
 advanced-cache.php 有一些自定义的选项可供配置,我们打开源代码编辑调成成下面的模式。
代码:
var $max_age = 3600; // Expire batcache items aged this many seconds (zero to disable batcache)
var $remote = 0; // Zero disables sending buffers to remote datacenters (req/sec is never sent)
var $times = 2; // Only batcache a page after it is accessed this many times… (two or more)
var $seconds = 0; // …in this many seconds (zero to ignore this and use batcache immediately)
max_age 代表缓存过期时间(以秒为单位),times 表示访问多少次才创建缓存(2 是最小值),seconds 表示在多少秒之后才创建缓存(0 表示立即)。
本文章已结束,如转载请注明:汇站网 » 宝塔面板下开启 Memcached Batcache 加速 WordPress
 微信扫一扫
微信扫一扫 支付宝扫一扫